After an Agave finishes flowering, it dies. But as it’s dehydrating, it becomes very colorful.
This specimen is at the start of its decline so I used Photoshop to intensify the color a little.
![]()
After an Agave finishes flowering, it dies. But as it’s dehydrating, it becomes very colorful.
This specimen is at the start of its decline so I used Photoshop to intensify the color a little.
![]()
Here’s a link to excellent Photoshop video training by photographer.
Ron Bigelow. Knowing how much time these things take to put together,
Ron is obviously very generous! Be sure to check them out especially if
you’re interested in learning more about Smart Objects.
Thanks Ron!
http://ronbigelow.com/videos/videos.htm
Photos of boulders coming tomorrow 🙂
![]()
The very FIRST STEP in creating a greeting card is to choose a card stock.
I personally use Red River pre-scored card stock in two sizes. 7 X 10 and 6.25 X 9.
Folded they are 5 X 7 and 6.25 X 4.5. I typically use matte stock but also gloss on occasion.
Recommendations from friends help in choosing your card stock but ordering a SAMPLE pack
from sources will save you money and LOTS of time. For instance, there are differences in
thicknesses, finishes and there are varying shades of white. It’s important to see how your
printer handles thick stock and how ink looks on each color sample.
When the sample pack arrives, take the time to print an image on each sample.
DON’T SKIP THIS STEP! Here’s how to set it up in your image editor:
1. Create a new document with the EXACT dimensions of your card stock.
For instance, if your card stock is 7 x 10, then your new document should be 7 X 10.
(Folded, this size will be 5X7)
The Resolution and color space should be what you normally use when you print.
![]()
2. Prepare an image and crop it to 5X7 at the resolution you set for your document.
(Note: if your image is larger than the document, you can of course just resize it)
3. Drag the image onto the new document. Since this is just a test and since most samples
have text on them, I don’t worry about image position but you could be as precise as you like.
4. Now that you have a test file ready, you can print it on each sample.
It’s important that your printer is set with the correct preferences for each sample.
The first thing you’ll set in the printer driver is the size of your paper.
In the case of card stock, this usually means you’ll need to define a custom size.
You also want the printer to know what kind of paper you’re using.
In the case of Red River, they have profiles for most or all of their papers.
Once you’ve set everything, SAVE these settings with the name/size of the card.
This will save you from having to enter all this information again.
NOTE TO NEWBIES:
If you’re completely new to printing, don’t stress about all these settings.
There’s only one you must know and that’s how to set a custom size (check your printer manual)
Other than that, you just need to set the paper TYPE (matte or glossy) and the QUALITY.
Your printing results might just rival the so called “experts” 🙂
Finally….I haven’t seen it but Red River has a Greeting Card Designer available.
It looks to be worthwhile if you’re completely new to creating cards.
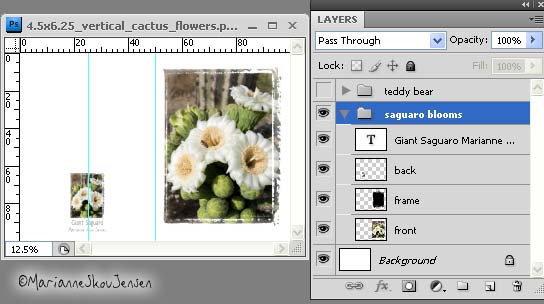
Here’s the Layers Palette of a vertical card showing an open and visible Group folder.
Do you get the idea that I have complete control over all elements?
For instance……
Maybe I don’t want the fancy edge on the next card or maybe I want to change the text.
OR maybe I want to replace the photo with a different Saguaro bloom! Yup……
I could even include several blooms in this group and only turn on the one I want.

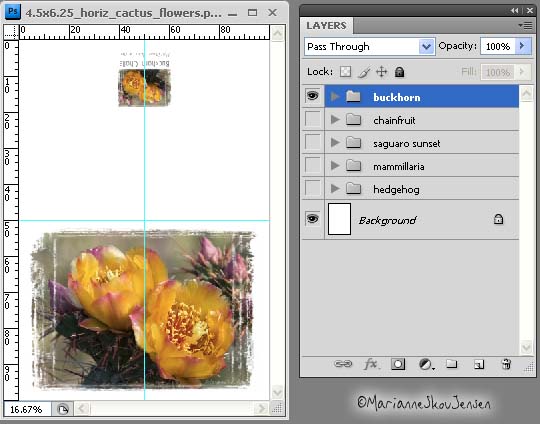
Heat kept me inside today so I spent time in my digital darkroom creating greeting cards.
What I want to show you is that I only use two files to create ALL my cards.
One file is in horizontal format and the other is vertical. Each file has multiple images.
Layer Groups are the key to keeping the image components and text nicely organized.
When I’m ready to print a card, only the group with the desired image is turned on.
It takes a little more time to set up but it sure is nice to have all your cards in one file!

What do you get when you fool with Mother Nature? A pattern that would look great as a silk scarf!
![]()
I started with a shot of blooming Sage.
![]()
The sky was heavily overcast so of course I couldn’t resist swinging my camera around 🙂
![]()
I began rotating it in Photoshop to find the best view which gave me the idea of blending two versions.
So I created a copy layer; flipped it horizontally, lowered the opacity and used the blend mode “darken”.
As a last step, I tweaked color and contrast using Levels and Curves.
![]()

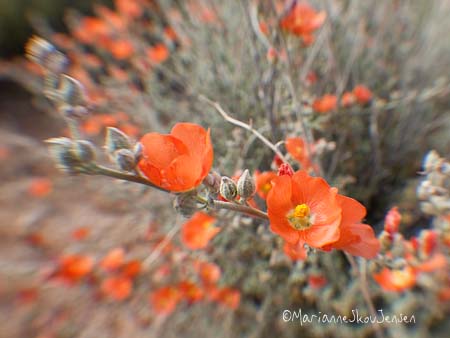
(Today’s photo has nothing to do with the text below. I just wanted to share another Lensbaby shot) 🙂
Our digital group (DIG) meeting this week had one topic….Lightroom. Barry L. White, (our guru extraordinaire) gave an outstanding presentation which I’m sure inspired anyone in the audience who didn’t own Lightroom to run out after the meeting and buy it! Imagine working on an entire folder of images at the same time (including cropping), and then being able to print, send them via email or make a webpage without ever having to leave the program! The time saving advantage is tremendous.
Elements users already have these capabilities so after the meeting, several people asked me if I thought that Elements and Lightroom would be all they needed. My answer is: It depends. If you already use Elements and it’s been taking care of all your creative needs, then my answer is YES. It’s a perfect combination. Lightroom’s image editing and database capabilities are far superior to Elements so all you’d need Elements for is for any creative stuff that involves altering pixels.
If you’re a full version Photoshop user and you’re trying to decide whether you need to upgrade to CS4 or buy Elements 7, then again, my answer is: It depends. Do you regularly use Layer Groups? Do you regularly use Smart Objects? Do you regularly work with Channels? There are more but if you depend on these, then you need to upgrade to CS4 because Elements doesn’t have these features available.
HOWEVER…..Elements users DO have an opportunity to add some powerful Photoshop features so as a full PS user, check out The Hidden Power of Photoshop Elements before you decide. These tools give Elements an impressive amount of power. Not quite CS4 but they might be all you need. If you are a current Elements user and you don’t know about this, check it out. It’s well worth adding to your copy of Elements.
Then I was asked if I knew whether Lightroom would retain keywords from Elements like it does from Bridge. I’ve been researching since then and although I couldn’t find a specific reference, my guess is that unfortunately it does not. Sorry. This means you have to start from scratch adding keywords. I wouldn’t let that stop you, though. As I mentioned previously, although you can also create a database using Elements, Lightroom is far superior. The time you spend now will serve you well in the future….especially with a growing library of images.
Finally….if you’ve never destroyed a pixel and don’t plan to, you might find that Lightroom is all you need 🙂

![]()
A more acceptable cause of death in Saguaros is an act of nature. In this case, it was probably a lightning strike.
Note: For those digital darkroom users out there, you can probably tell that I’ve been playing with High Dynamic Range (HDR) this week. It’s hard to resist when you have clouds. Forgive me for getting a little carried away sometimes 🙂
![]()
I’ve been hearing about Tres Amigos ever since I first starting hiking with the MSC so I was excited to finally have a chance to photograph them. What makes them unusual is not that there are three standing so close together but that they are in perfect alignment….as if they had been planted. The general consensus is that it’s a fluke but maybe someone planted them about 200 years ago? Either way, they make a wonderful photo op. We’ve been having stormy weather for a few days so I thought these three friends would look great with a kind of antique look.